
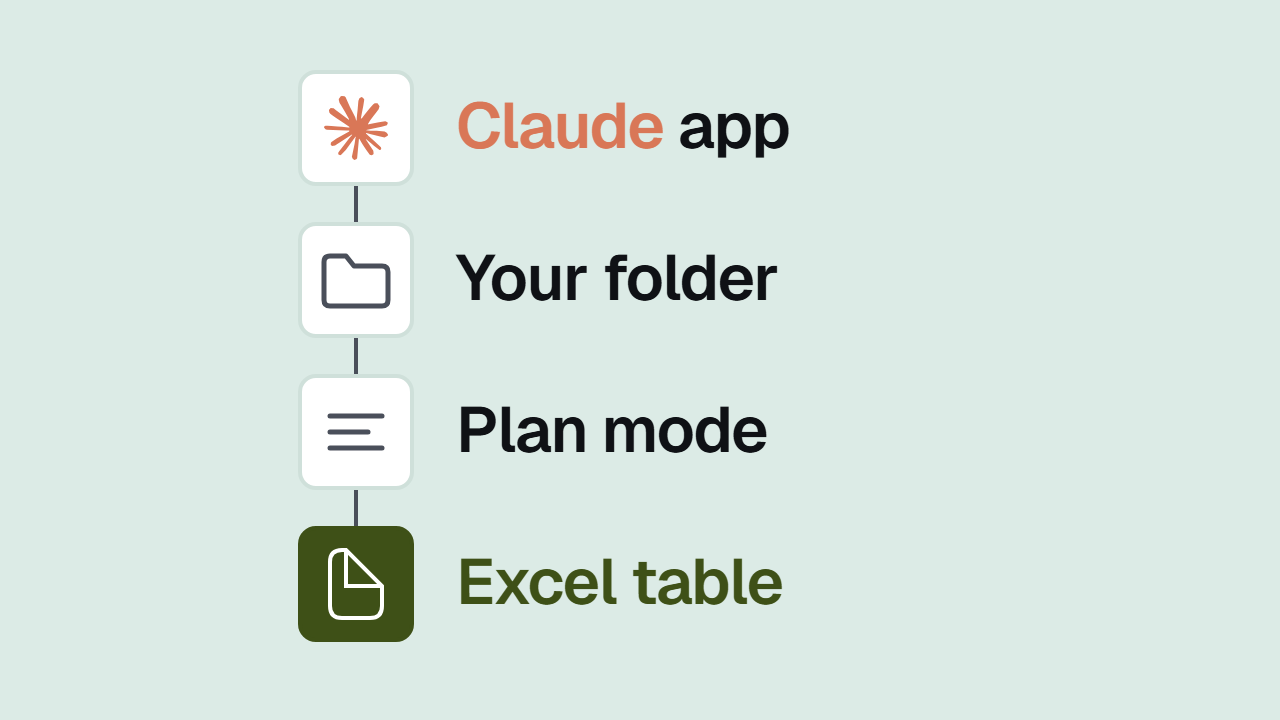
Most people know Claude as a chat widget: you type a question, Claude answers, and you do the rest yourself. Claude Code works differently. You give it a folder on your computer, and it opens the files in it, edits them, creates new ones and carries a task through from start to finish.
The name is misleading: it is not just for programmers. With Claude Code you can sort a folder of invoices, put together a report from ten Excel files, or build a small tool that saves you an hour a week. Here is how to set it up step by step, even if you have never opened a terminal.
Claude Code works inside the Claude app: you give it a folder on your computer, and Claude opens, edits and creates the files in it itself. To start, install the app, prepare a project folder, choose a permission mode and give it a first task. You do not need the terminal to begin.
What you need
A paid Claude plan: Pro, Max, Team or Enterprise. Claude Code is not included in the free plan. If you are still choosing a plan for your company, we covered that separately: What Claude costs a company.
A computer with Windows 10 or later, or a Mac with macOS 13 or later. You do not need administrator rights.
1. Install the Claude app
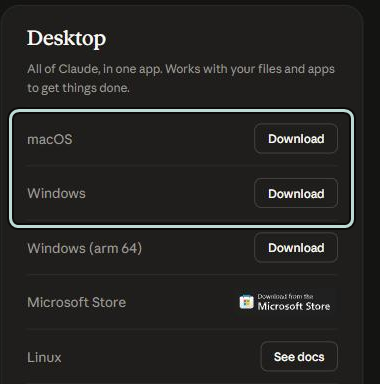
The simplest route is the Claude desktop app. Claude Code is already built in, on the "Code" tab, so there is nothing else to install.
- Download the app from claude.com/download (the Windows or Mac version).
- Install it like any other program and sign in with your Claude account.
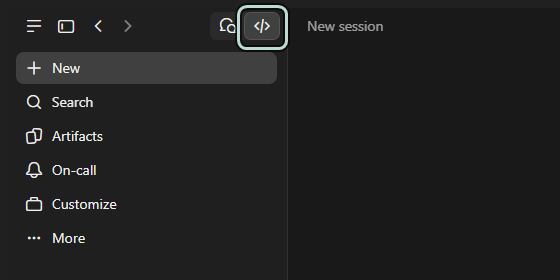
- Open the "Code" tab (the
</>icon).
2. Prepare your first project folder
Claude Code always works in one folder, and that folder is your safety boundary. What it can see and what it may change is set by the folder you give it.
For the first time, create a new folder, for example "Claude test", and copy a few files you want to work with into it: a couple of invoices, an Excel sheet or some documents. Copies, not the originals. That way you can experiment safely and nothing important gets broken.
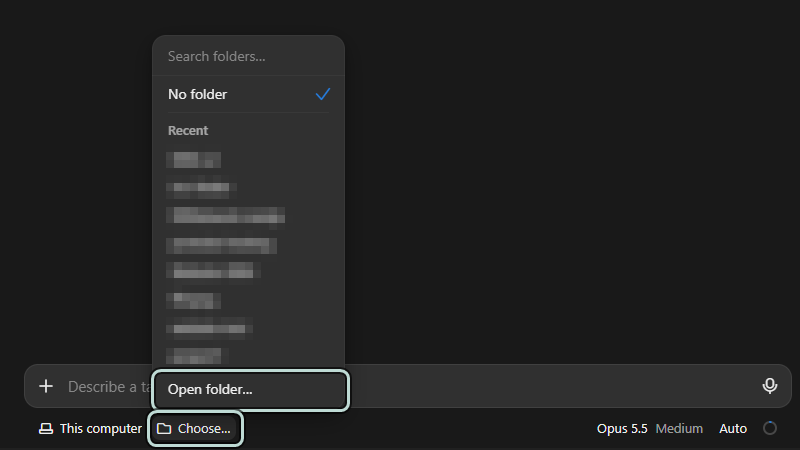
On the "Code" tab, click "Choose…" under the message box, then "Open folder…", find your folder and click "Select Folder".
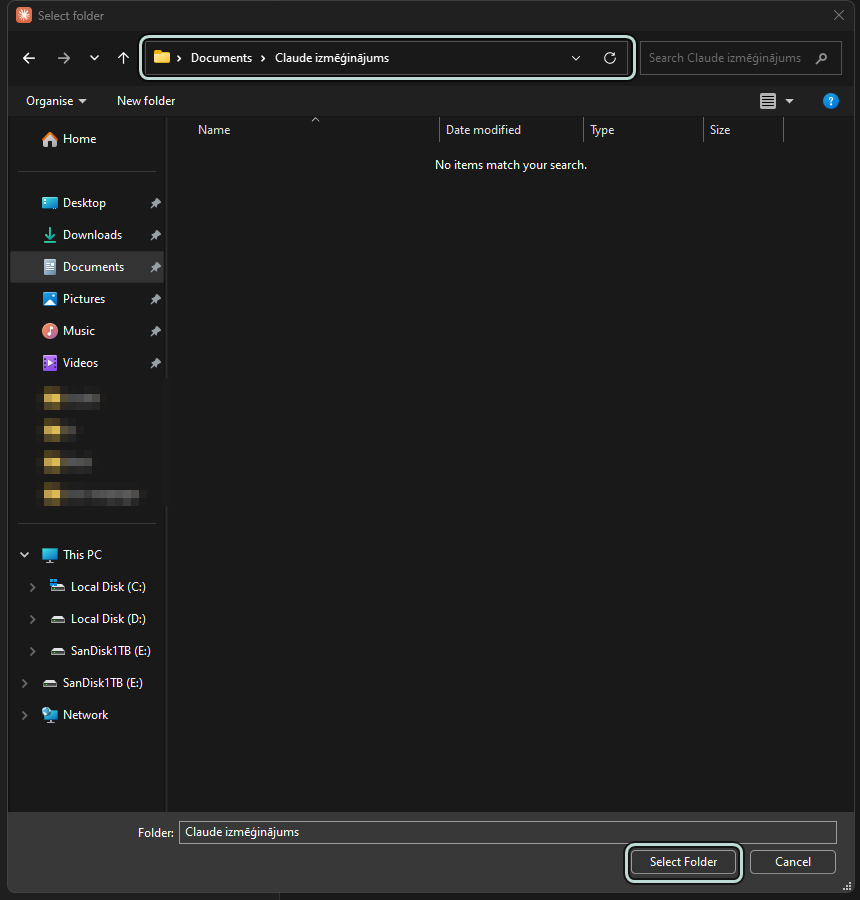
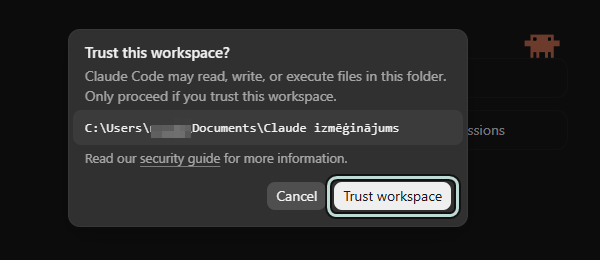
The app will ask "Trust this workspace?", meaning whether you trust this folder. Click "Trust workspace". This lets Claude read and change files in this folder and nowhere else.
3. Choose a permission mode
Under the message box, next to the model name, is the mode menu. At first it says "Auto". The mode sets how much Claude may do before it asks you:
- Auto: Claude decides for itself what needs your permission. This is the default.
- Manual: Claude asks for permission before every change.
- Accept edits: edits files on its own, but asks before anything else.
- Plan: Claude only reads the files and writes a plan. It changes nothing until you approve the plan.
- Bypass permissions: does everything without asking, including deleting files. Do not choose this one, unless you REALLY know what you're doing.
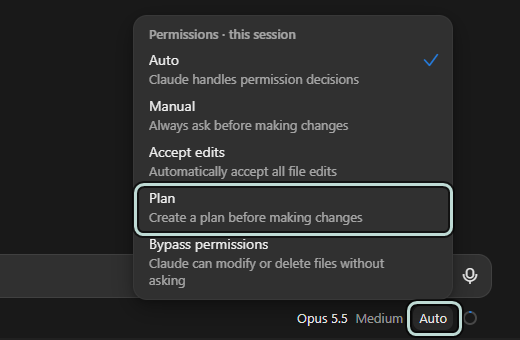
I suggest starting with Plan. You see what Claude is about to do before it does it, and you quickly learn how it thinks. Once you trust it, move to Accept edits.
4. Your first task
Write it the way you would brief a colleague: what needs doing and what the result should be. For example:
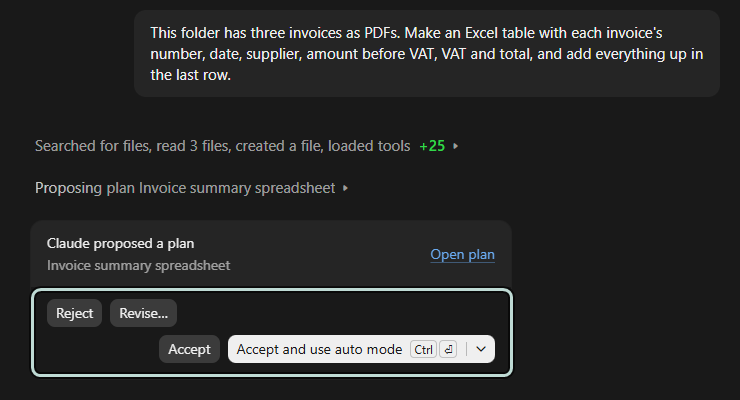
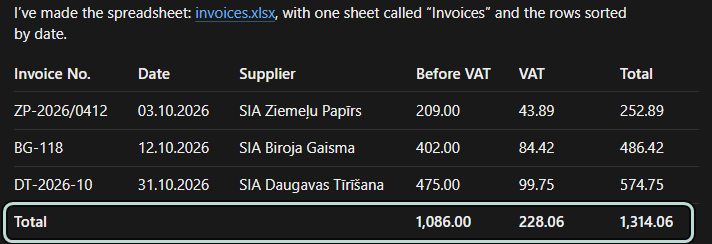
This folder has three invoices as PDFs. Make an Excel table with each invoice's number, date, supplier, amount before VAT, VAT and total, and add everything up in the last row.

In Plan mode, Claude first reads the files and shows you a plan: what data it found and what it will do with it. Under the plan are the buttons "Accept", "Revise…" and "Reject". If the plan works for you, click "Accept".
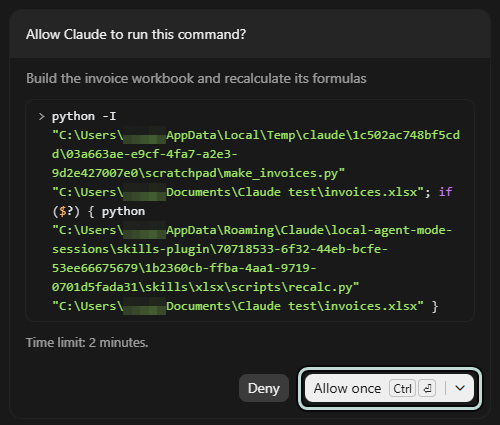
After that the mode switches to Manual, so Claude asks "Allow Claude to run this command?" before each command. In our test, that was the command that builds the Excel file and recalculates its formulas. If the command belongs to your task, click "Allow once". "Always allow" switches the session to Accept edits, and Claude stops asking about file edits.
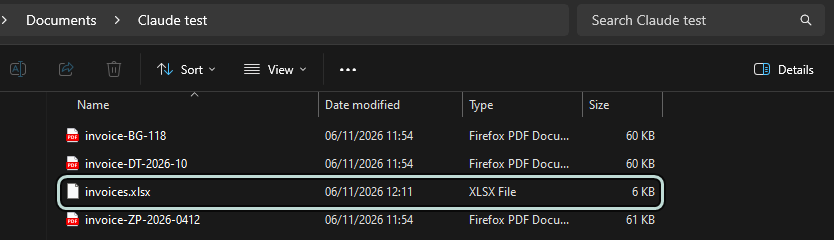
The result, in this case an Excel file, appears in the same folder, and Claude tells you what it did and what it checked. In our test it put the three invoices into a table, and the total of EUR 1,314.06 is an Excel formula, so it recalculates by itself if you change any number.
5. Give Claude a note about the project
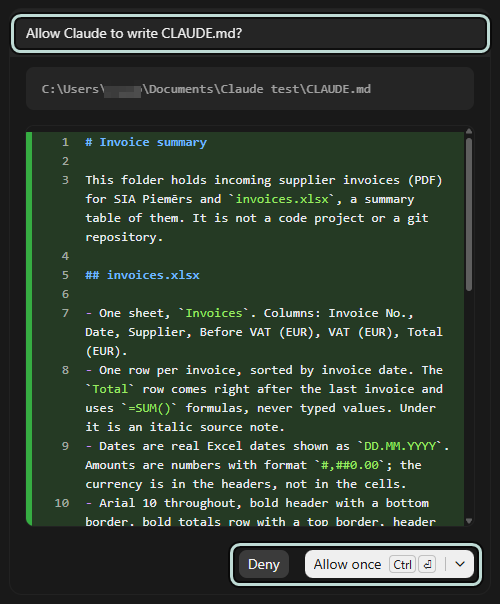
Every time you open a new conversation, Claude starts with an empty memory. So you do not have to explain everything again, the project folder can hold a file called CLAUDE.md: a short description of what the project is, where things are and what never to do. Claude reads it at the start of every session.
You do not have to write this file yourself. Ask Claude: "Create a CLAUDE.md for this project". Before the file is written, Claude shows you its contents and asks for permission. Read what it wrote and add what only you know.

More on managing Claude's memory in longer projects: How to manage context in Claude Code.
When to move to the terminal
The app is a good start, but some features only work in the terminal, and that is where Claude Code gets updates first. If you ever want to switch, it takes five minutes.
Windows. Open PowerShell (type "PowerShell" in the Start menu) and paste:
irm https://claude.ai/install.ps1 | iexMac. Open the Terminal app and paste:
curl -fsSL https://claude.ai/install.sh | bashWhen the install finishes, close the terminal, open it again and check with claude --version. If you see a version number, everything is in place.

Then go to your project folder and start Claude:
cd Documents/"Claude test"
claude
The first time, a browser opens where you sign in with the same Claude account. Once you see the Claude Code version, the model and your folder's name, you can type a task just as you would in the app. In the terminal you switch modes with Shift+Tab.

Two things that most often trip up Windows users:
- "claude is not recognized". The terminal does not yet know where Claude was installed. Close it and open it again.
- "irm is not recognized". You are in the Command Prompt (CMD), not PowerShell. Open PowerShell and try again.
On Windows it is also worth installing Git for Windows (git-scm.com). Claude Code works without it, but with it Claude has more tools at hand.
If you want it for the whole team
You can set up Claude Code on one person's computer in half an hour. A whole team needs more: shared rules, shared instructions and one way of working with the company's files. That is exactly what we do in Pamats.